DIY server rack
Many homelabs take advantage of SFF PCs because they are plentiful and don’t take up space, but I have a bunch of micro-ATX motherboards sitting around. As I continued to fiddle with my homelab, it quickly became apparent that keeping a server just standing on the floor, with network cables snaking hither and thither, was not a great idea.
When I was getting started, I had splurged a bit and bought a 2U case. Because, you know, racks are cool, and relatively affordable on Amazon. Despite being completely excessive for what I’m doing, I suppose I thought that’s where I was going.
Shortly thereafter I was laid off from work, and purchases like that became hard to justify.
Fear not, though, because I’m fortunate enough to have a garage, tools, and some scrap wood lying around. I briefly considered buying just server mounting rails, but my mindset had flipped. Gonna DIY something, might as well go all the way.
There are plenty of DIY racks made out of 2x4s out there to see, alongside the venerable Lack rack. I considered that, but then noticed the salvaged wooden bedframe I’d nabbed a while ago. (Everybody has a voice that says “That looks like it might come in handy one day” and grabs stuff off the side of the road on garbage day, right?)
The nice thing is racks use standardized dimensions and units, so I didn’t even bother making a plan in Sketchup as I usually do. Isn’t this just 4 posts with some connecting framing? Sure it is.
I also didn’t really take photos as I was improvising this, as I wasn’t sure entirely it would come together. Sorry if this is hard to follow.
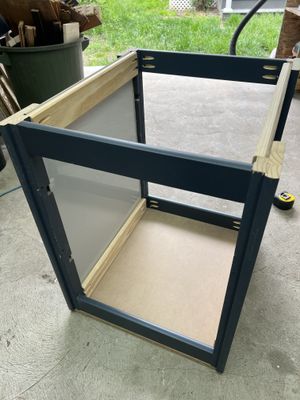
Pocket holes in those ~1"x4" cross pieces along both width and depth are plenty sturdy enough. The semi-glossy side piece is taken from an old Ikea cabinet door and neatly hides everything.
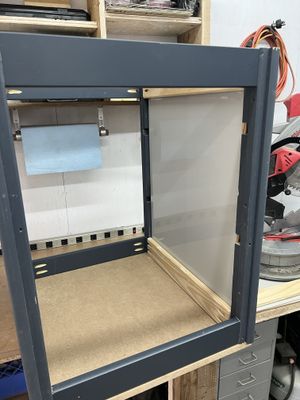
I used some scrap 3/4" MDF as a top and bottom. I screwed in from the bottom to attach it, but used my air nailer to drive 1 1/2" brad nails from the top to keep the holes less noticeable.
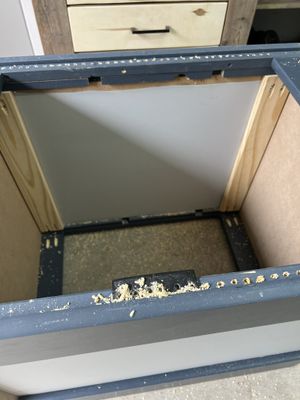
The bedrails already had a nice inset which would allow server mounting holes to be drilled, so I 3D printed a small template to reflect the standard hole spacing racks use.
Here is where my DIY mindset meets my impatience. I actually have a drill press, so could have done a “proper” job with this. But that would take time. (Surprise, the tension between “I don’t care that much, just make it functional and get it out the door” and “focus on craft; if it’s worth doing it’s worth doing well” shows up everywhere.) I ended up drilling these by hand, which means that many holes aren’t aligned perfectly and don’t go through at a perfect 90° angle. But it’s wood, which is a bit more forgiving.
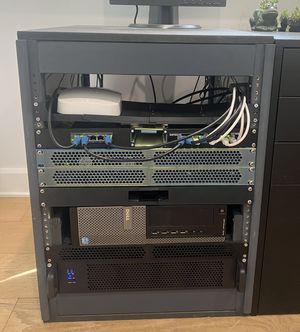
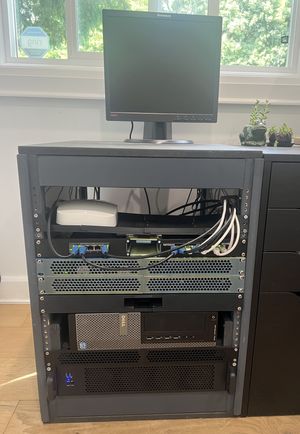
Here’s the result as of summer 2025.
I also had some scrap paint lying around, so I threw that on too. I 3D printed some 1U blanks, mounting brackets for various networking pieces, some little cable management thingies (could do better here), and a shelf (which is clearly not cutting it). These are just beefier lag bolts or similar holding the equipment in. I don’t need casters, as this is light enough to drag for the rare times I need access to the back.
The nice thing about this being wood is — Need a shelf? Make one out of scrap. Need to support the back of a heavy server? Screw something in.
Airflow seems fine so far, and this is 12U so I have room to reorganize or expand. (I don’t really foresee needing to, but isn’t more fiddling the point of a homelab? Like, yes, I agree with you, I need a UPS in here obviously.)
Also, you can just make out that this ended up almost exactly the same height as my Ikea Alex drawer unit, so I have a nice additional work surface as well.
A win all around!
Addendum: As of today, I still have some of these materials lying around. If you’re in the Toronto area and silly like me interested in something similar, let me know and I can probably hook you up. 🤓🛠️